How to use Epidemic Sound’s AI-powered Studio
Learn how to use Epidemic Sound’s AI-powered Studio.
What is Studio?
Studio is an AI-powered soundtracking tool exclusive to Epidemic Sound. Built to match your video content with music and sound effects from our world-class catalog, it creates cohesive soundtrack drafts complete with music, sound effects, and transitions.
Building a soundtrack from scratch is often the biggest creative blocker. With Studio, you’ll never start from silence. The tool provides a complete soundtracked draft of your video, ready for you to work your own creative magic.
Unlike stock libraries and AI-generated music, Studio blends the speed of AI with original tracks produced by our award-winning artists and rising stars. You’re not just creating a soundtrack quickly — you’re crafting something powered by original, authentic music that makes people feel.
Studio is available in Epidemic Sound Labs, where you can try new features and give us feedback. For an even smoother soundtracking workflow, you can use Studio right alongside Premiere Pro with our Adobe plugin. To access Studio and all the latest features, update your Adobe plugin.
What does Studio do?
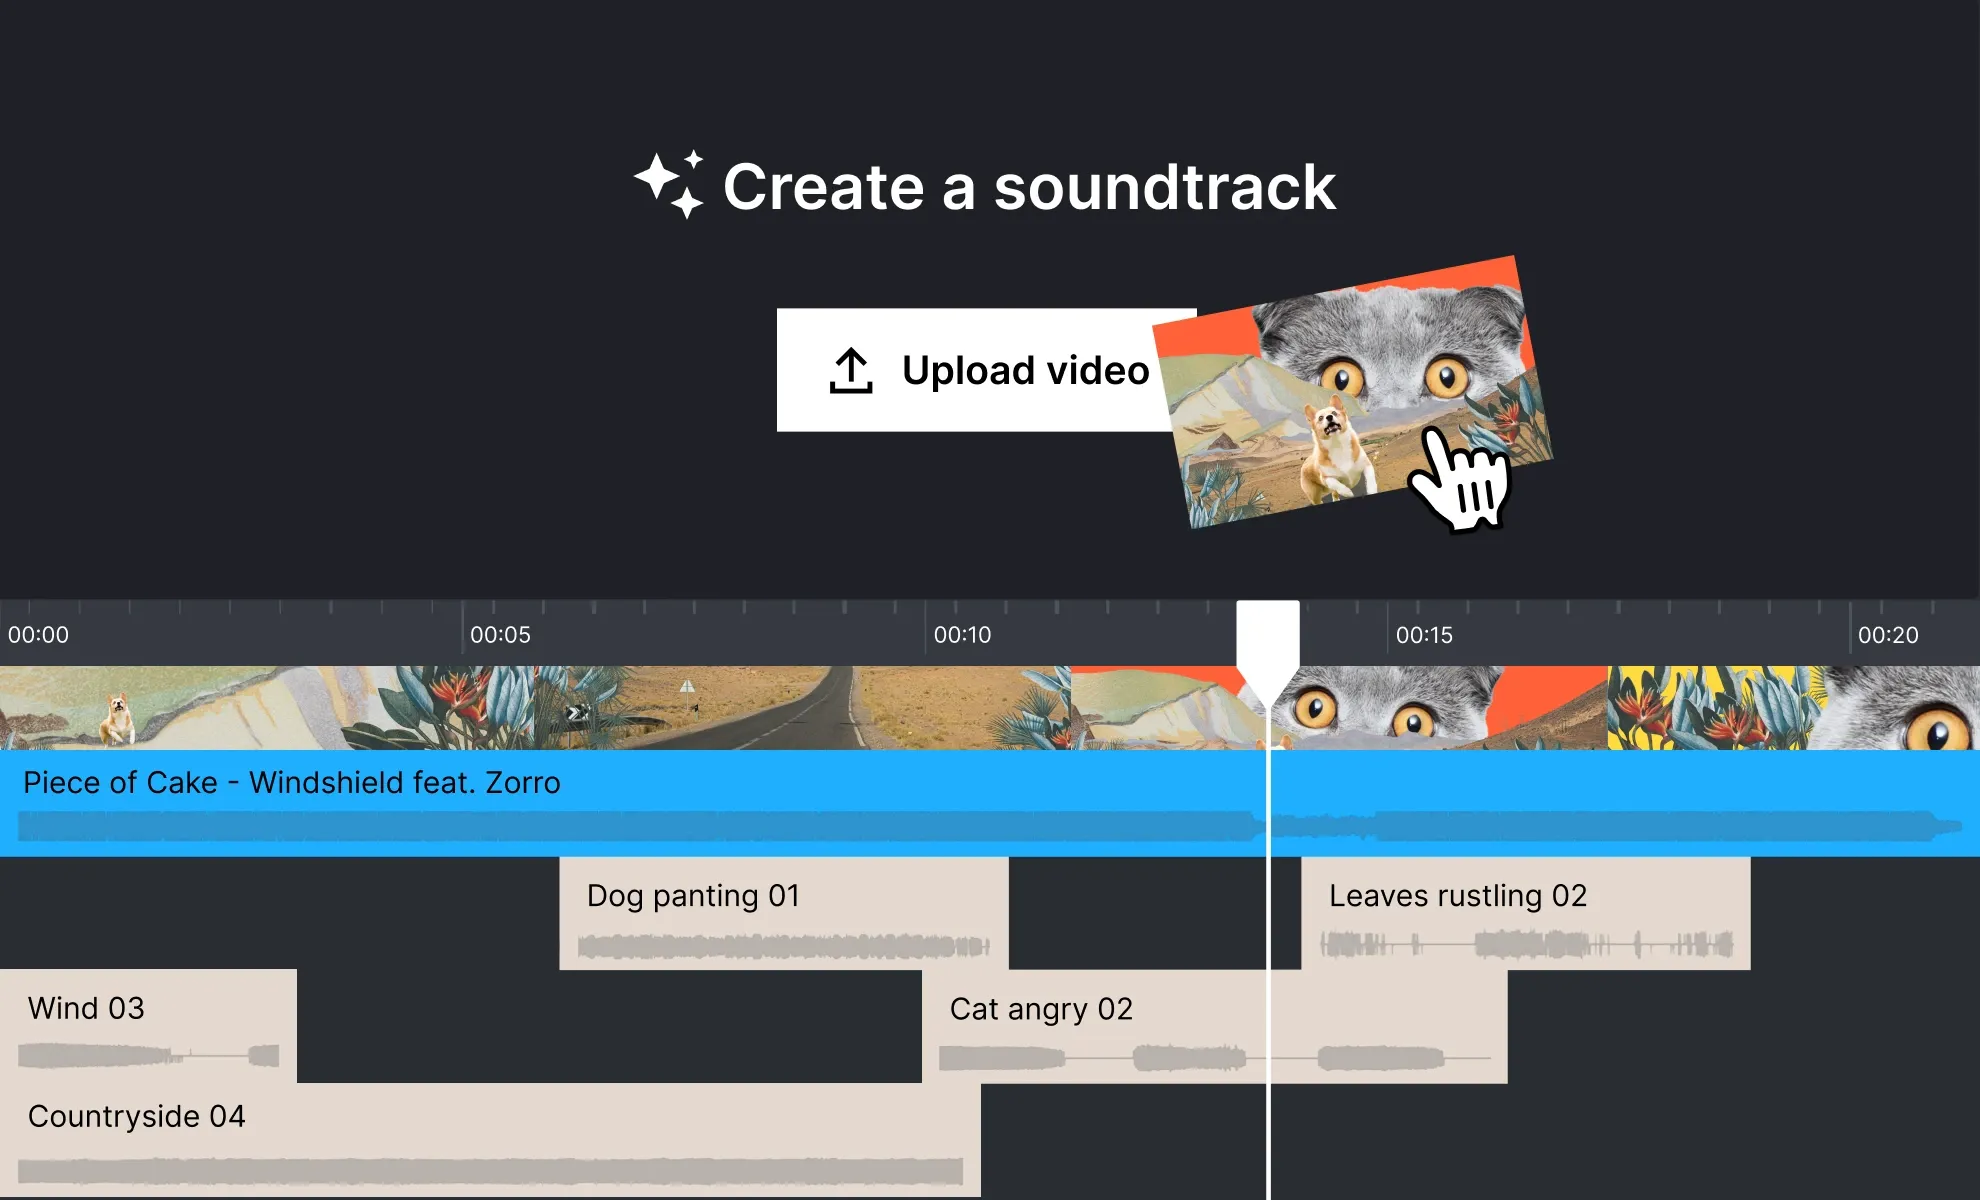
Studio takes your video and creates a synced soundtrack draft, matching music and sound effects to every frame. From there, you can solo, mute, delete, move, and trim individual audio clips, tailoring the draft to suit your project.
For professionals, it supercharges your creative flow, saving hours of search and sound design. For creators new to the soundtracking process, it’s an intuitive tool that empowers you to add music and sound effects to your video.
How to use Studio
Studio is found in Labs, and is available to all Epidemic Sound users. If you’re an Enterprise customer, you’ll need to ask your Customer Success Manager for access.
Here’s how to access and use Studio.
1. Log in to your Epidemic Sound account
You’ll see the “Labs” tab at the top of the page. It’s handily accompanied by an icon of a laboratory flask.
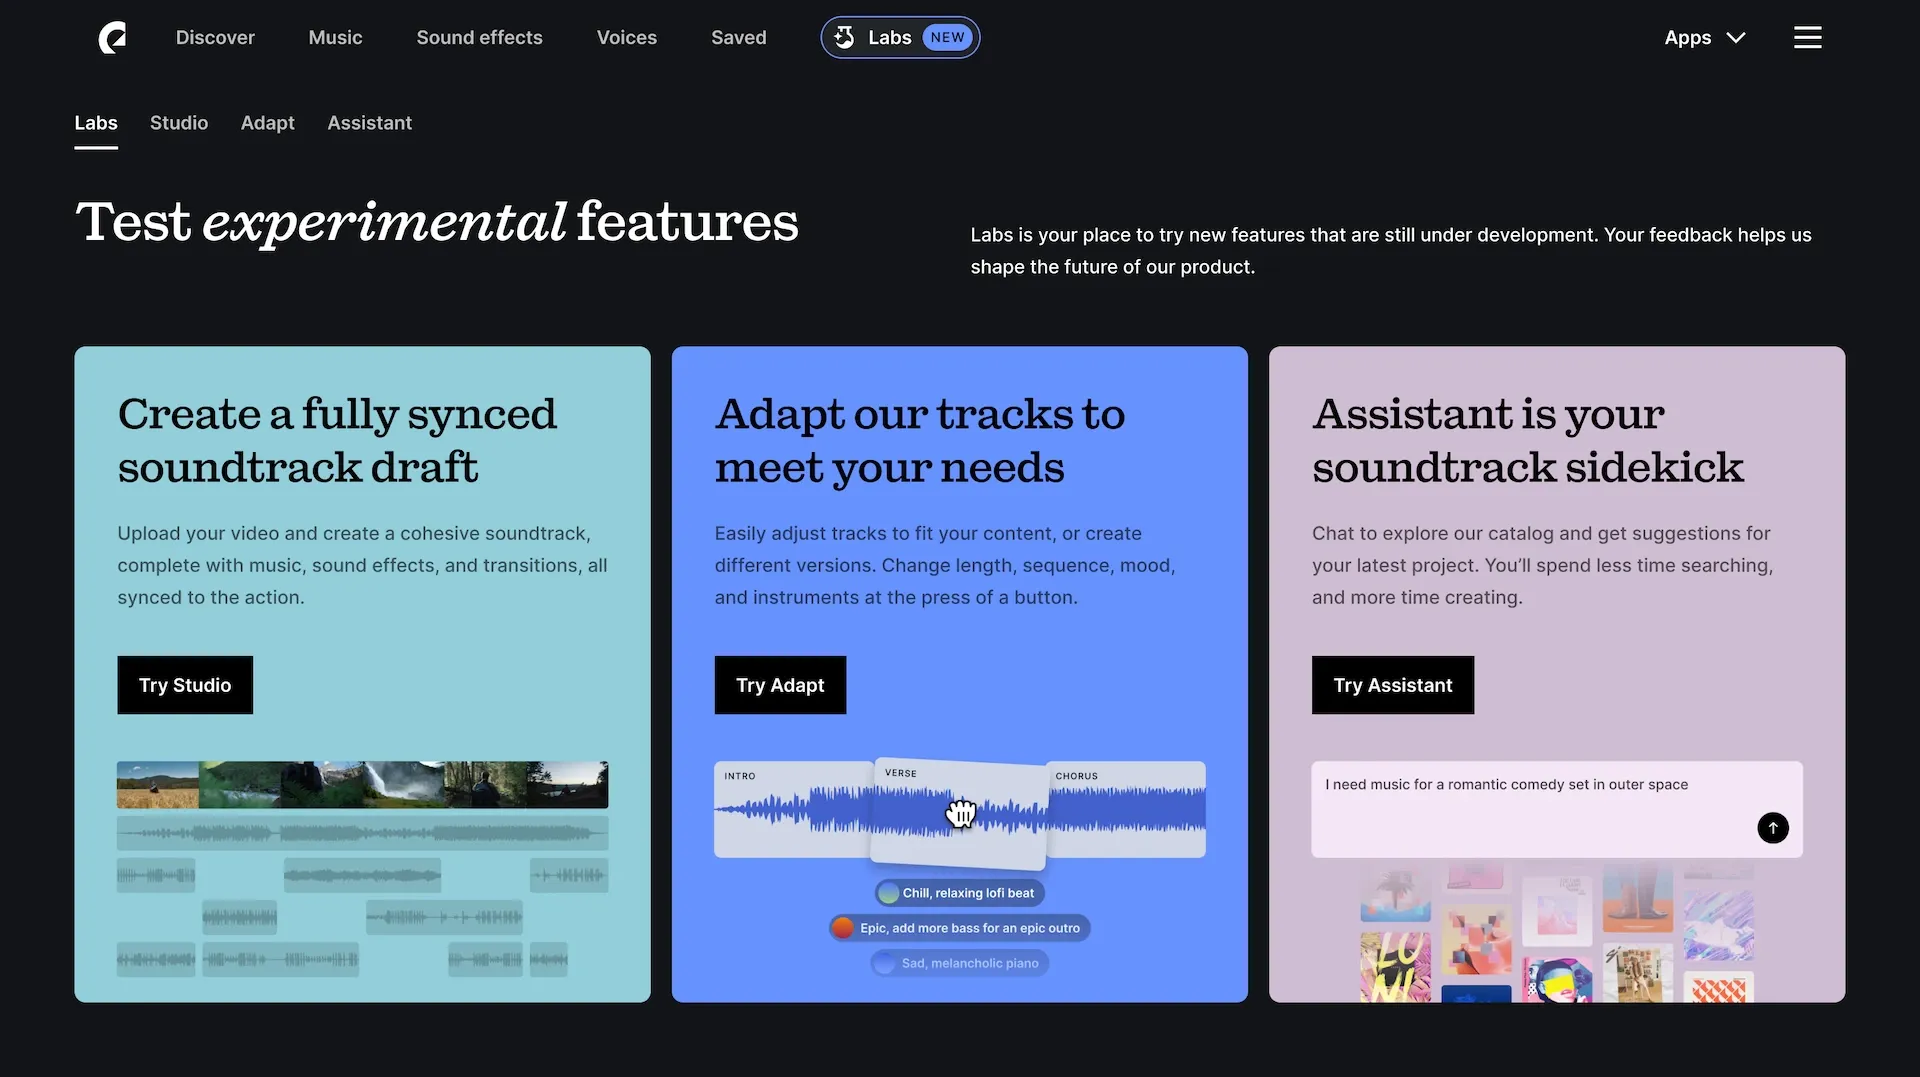
2. Click the Labs tab and enter the Labs page
This is your space to explore new tools that make soundtracking simpler, faster, and more intuitive. The tools found here are in development, and will change based on your feedback.
3. Click “Studio”
There’s a “Studio” tab at the top of Labs, plus a button further down. Clicking either will take you to the Studio workspace.
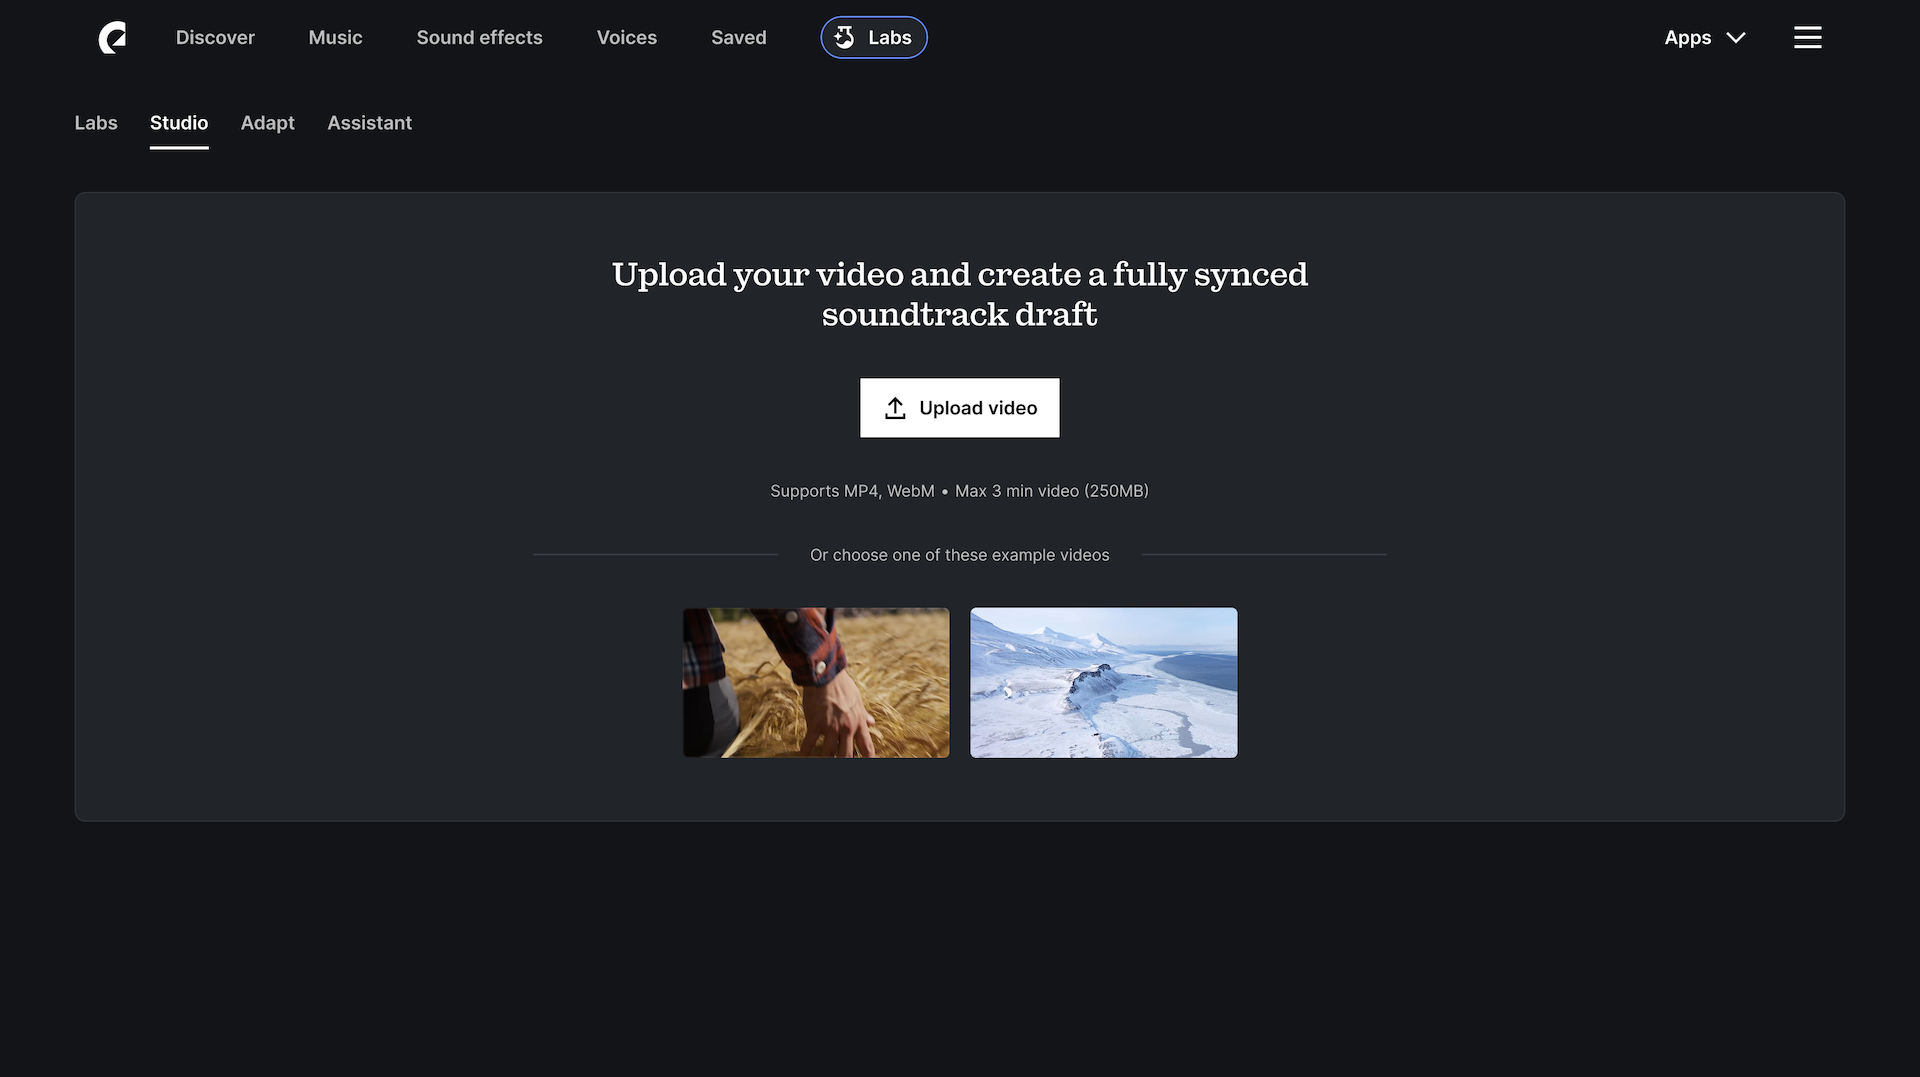
4. Choose your video
Click the “Upload video” button to upload your own content. Studio currently supports MP4, MOV, and WebM video files, with a maximum file size of 600 MB and a length of 4 minutes.
If you don’t have any videos handy or just want to get a feel for Studio, you can try one of the sample videos further down the page.
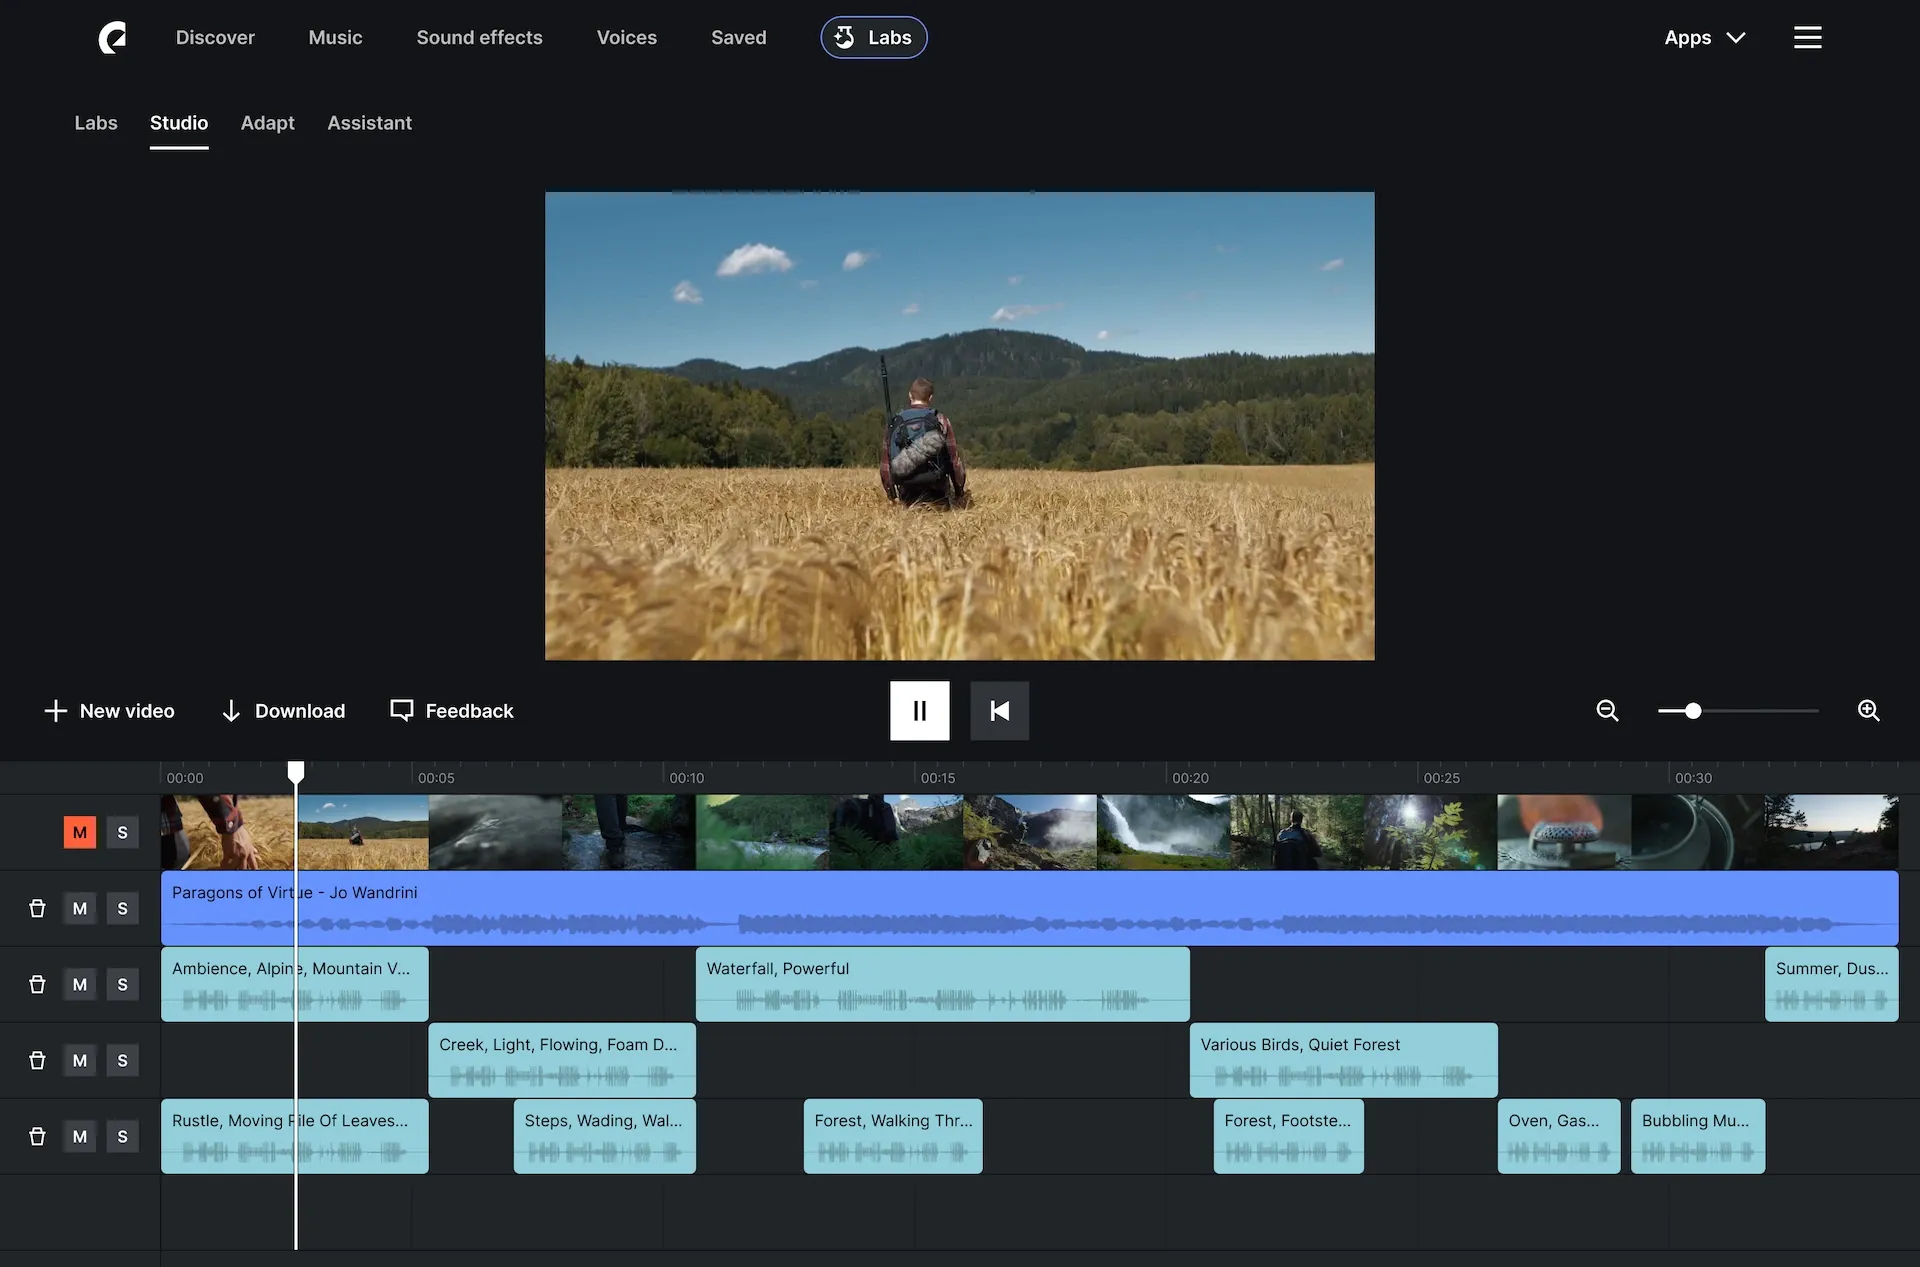
5. Your soundtrack is created
The loading screen will kick into action. Once it’s done, your video will appear in the Studio workspace. Underneath, you’ll see a project timeline containing separate lanes for video, music, and sound effects. If your project features a lot of clips, you can zoom in with the scroller in the top-right corner of your timeline.
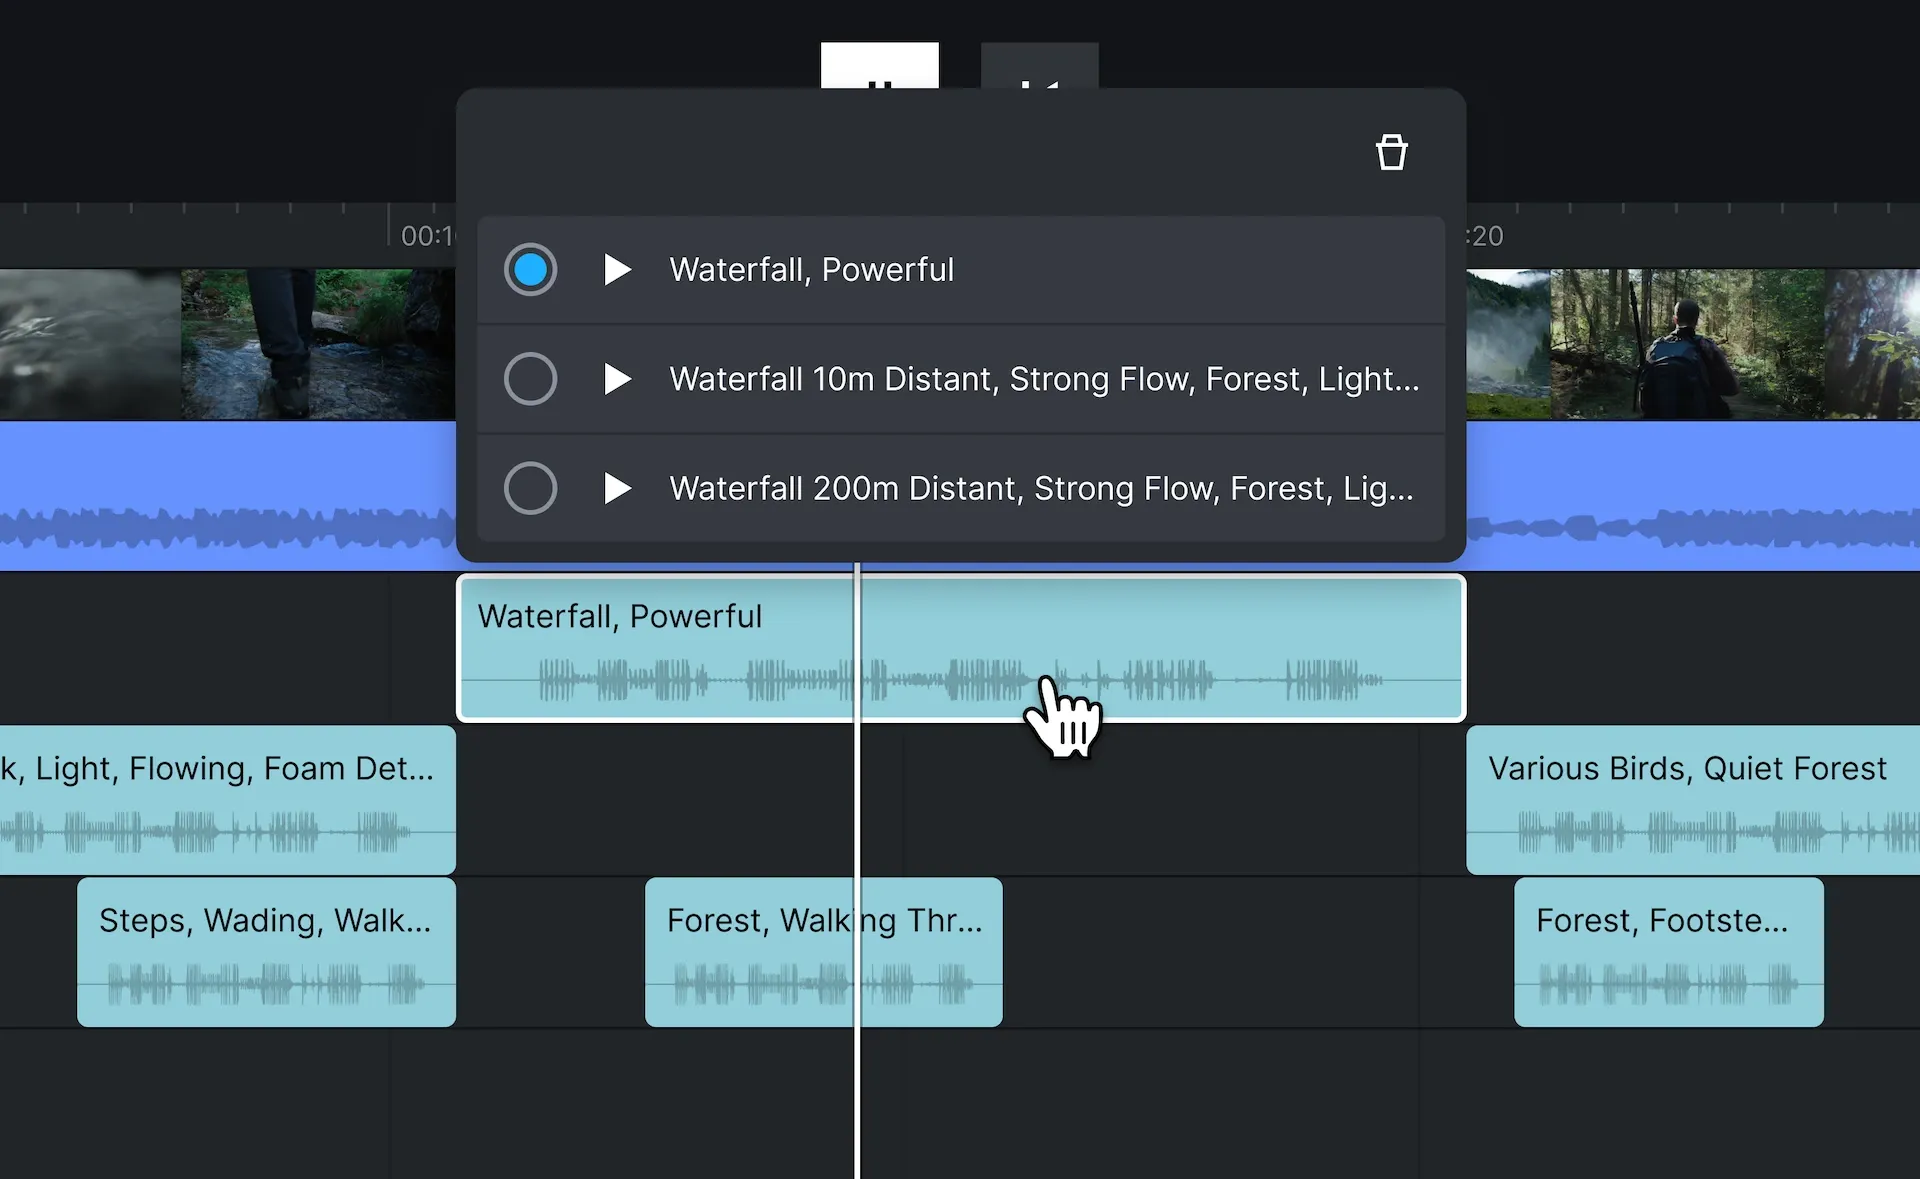
6. Try different options
If you want to try different music or sound effects, click on the clip you’d like to change. You’ll find more suggestions here, which you can preview with the “Play” button and add to your timeline by pressing the “+” button. You can also delete audio clips with the trash button.
7. Customize different lanes and clips
Switch up the vibe by soloing, muting, or deleting different lanes. Maybe you prefer your content with no sound effects, no music, or something in between. Mute lanes on the timeline with the “M” button on the left-hand side, solo lanes with the “S” button, or delete them with the trash button.
If you’d like to trim a specific piece of audio, click on the start or end of the clip and drag it right or left, respectively. You can also click and drag audio clips to move them across the timeline.

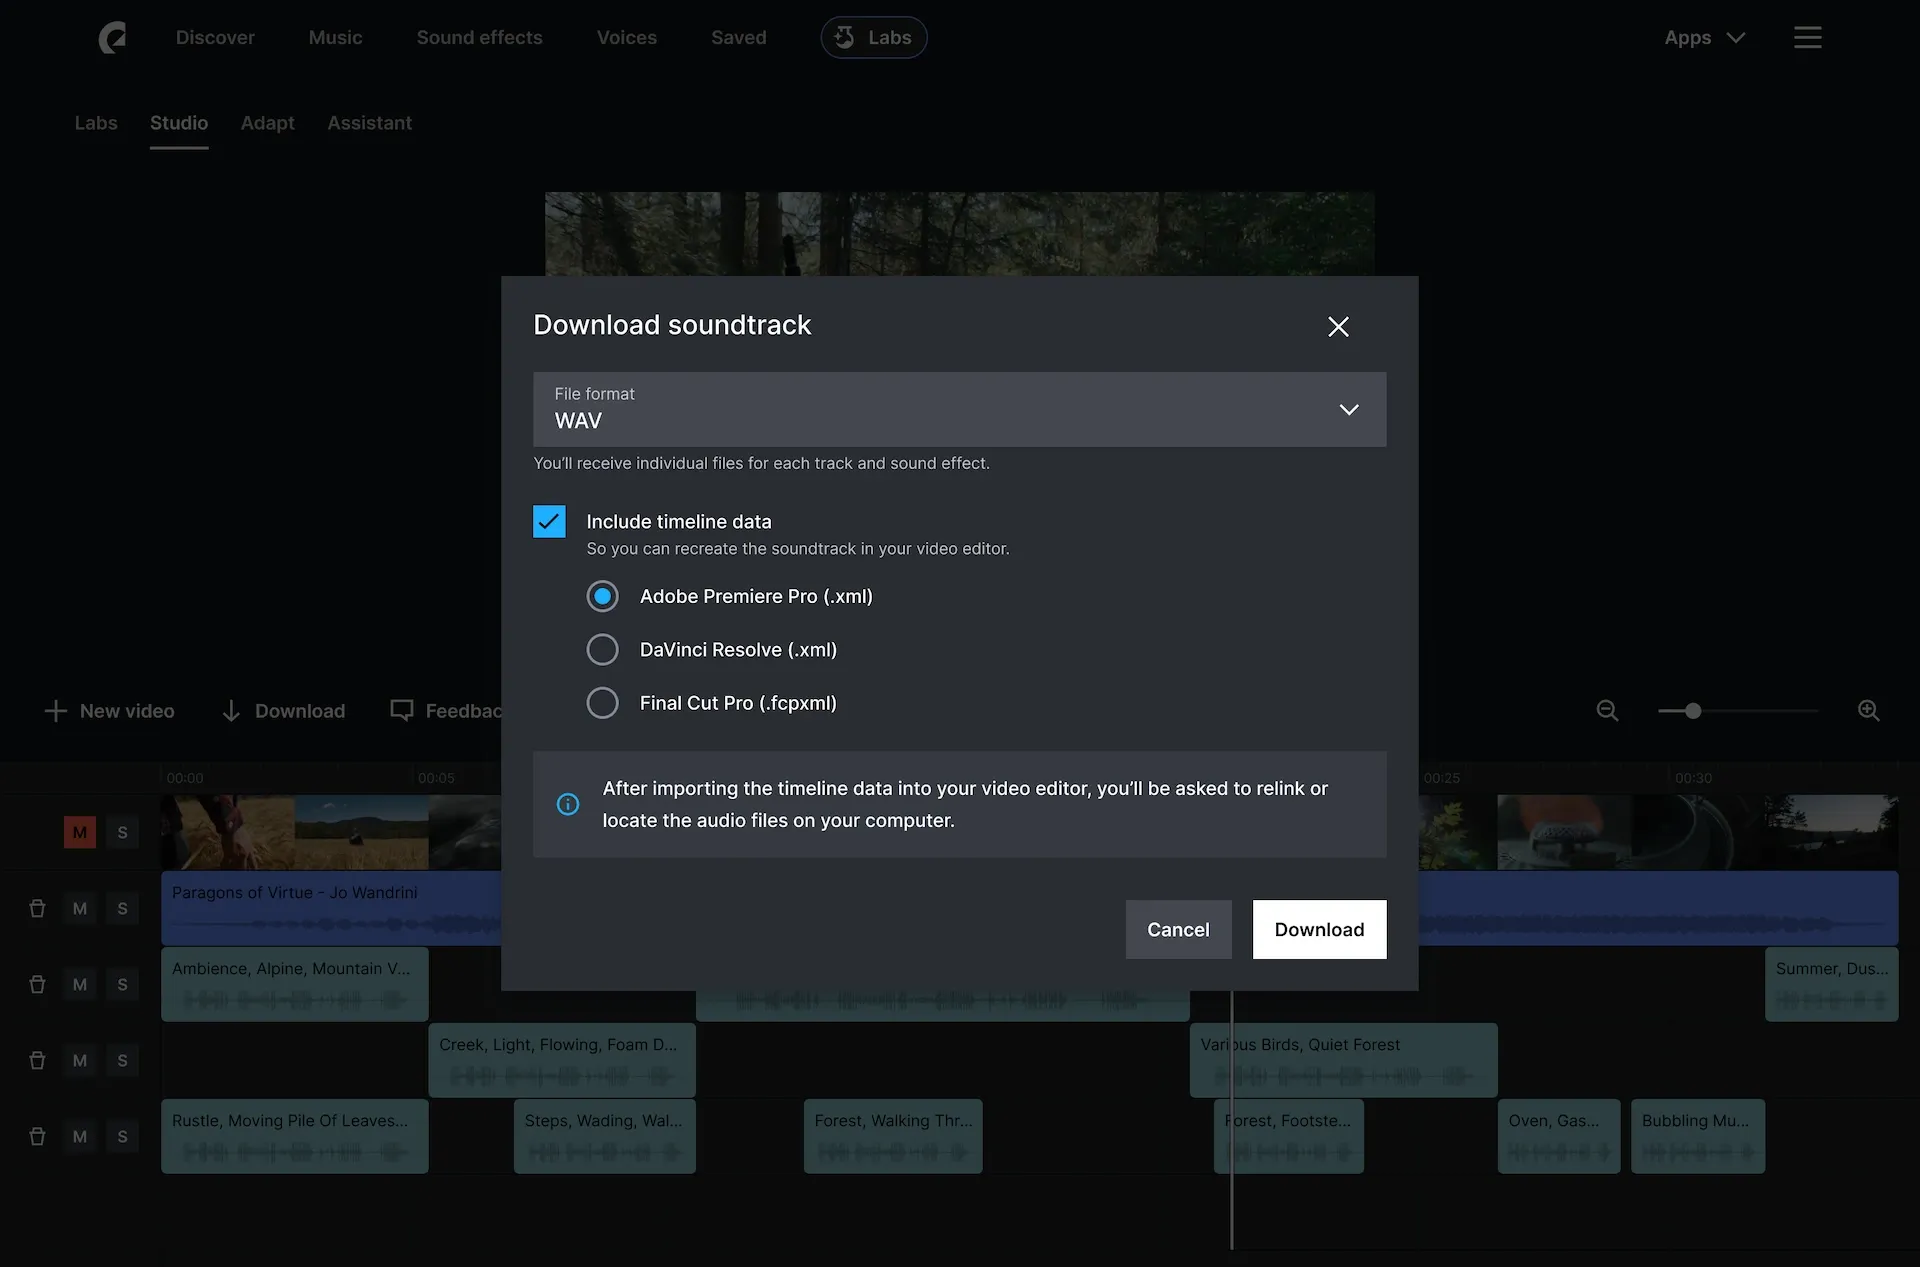
8. Download your project
If you’re happy with the results, click the “Download” button at the top-left corner of your timeline. This downloads the individual tracks and sound effects as WAV or MP3 files. To save the full timeline data and placement, you can download an XML file. From there, you can import the XML into your video editor and pick up where you left off — all the files will be synced.
If you want to keep experimenting with different content, click the “New video” button next to “Download.”
Feedback from you will make the Studio experience faster, smarter, and more intuitive over time. Once you’ve used Studio, we’d love to hear from you. Click “Feedback” to the top-left of your timeline to let us know what you think.